Upcoming Mini 3 Axis Alexmos Brushless Gimbal Controller specially designed for DJI Phantom and GoPro (smaller camera) based brushless Gimbals. Available soon
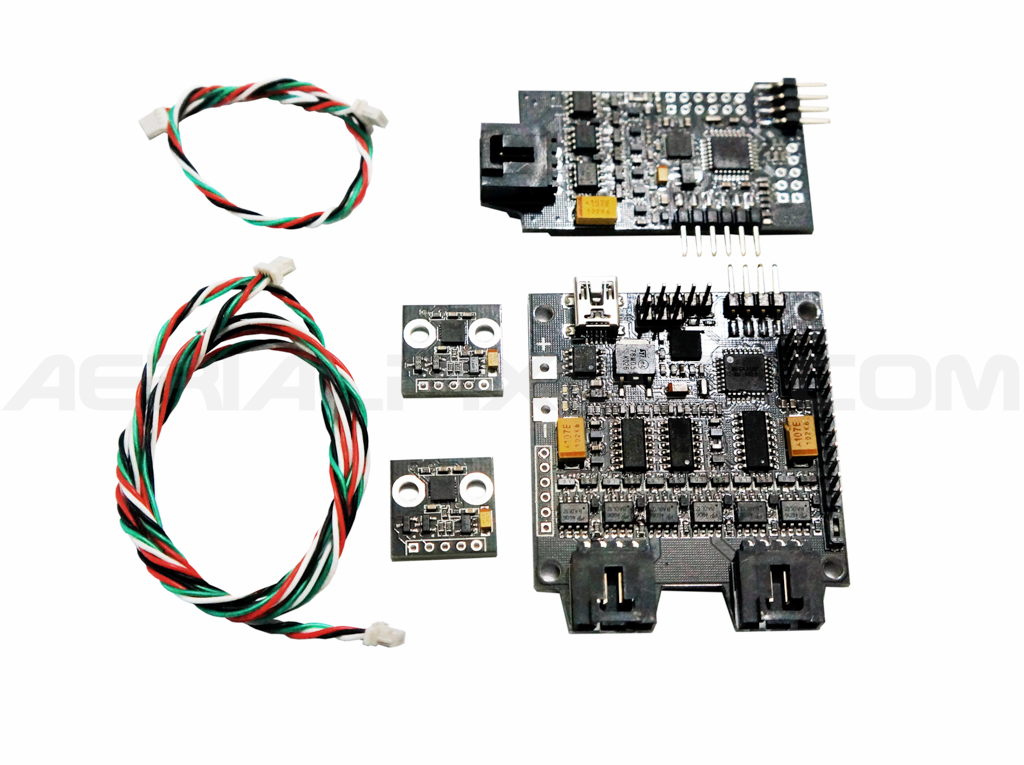
Upcoming Mini 3 Axis Alexmos Brushless Gimbal Controller specially designed for DJI Phantom and GoPro (smaller camera) based brushless Gimbals. Available soon
Due to large amount of requests and many having issues putting the boards together, we will be releasing the current DIY Box fully assembled and soldered.
What’s included so far:
Try this at your own risk. Advanced soldering skills and soldering iron with an extra fine tip needed.
Required parts
1 x 10K Resistor
1 x 33K Resistor
Solder one end of the 10k resistor to (-) Negative Battery Supply pad.|
Solder one end of the 33k resistor to (+) Positive battery Supply pad
Solder the 2 free end together
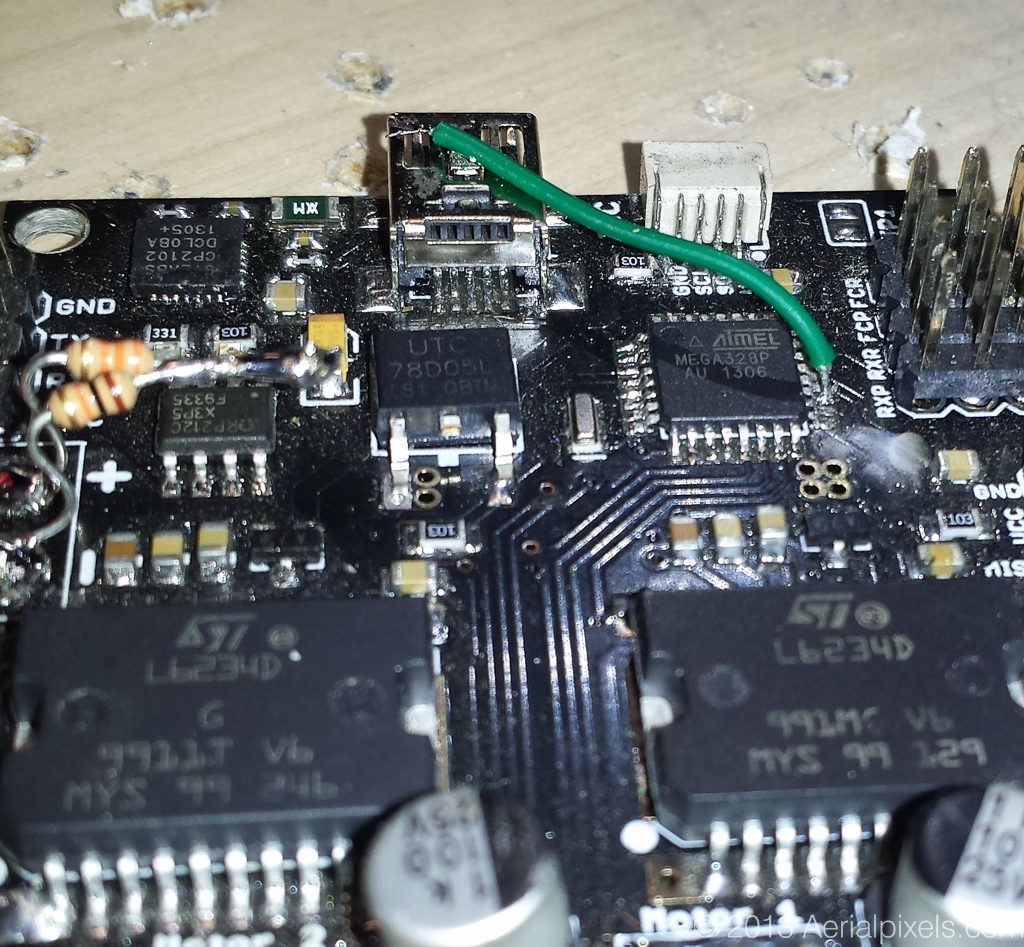
Solder a wire from pin number 19 of the 328 chip to the point where the 2 resistors are soldered together
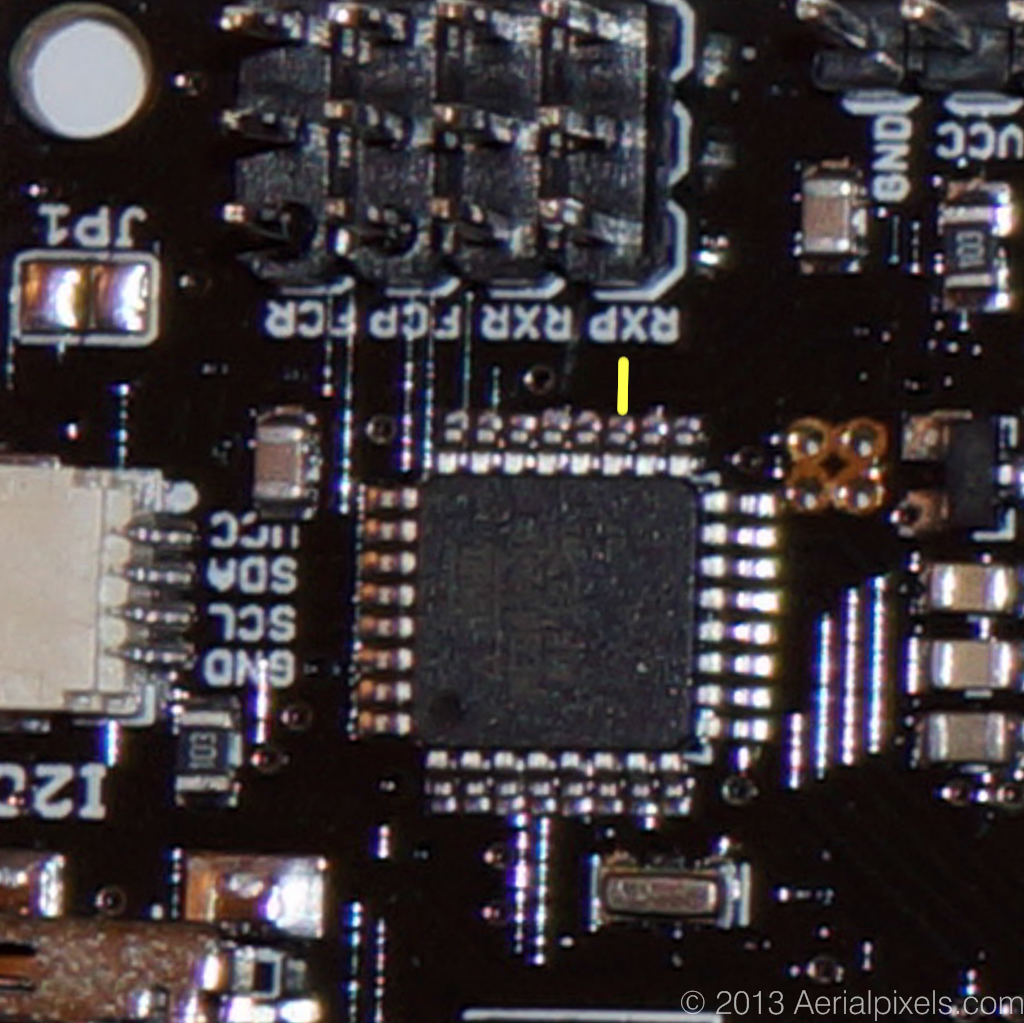
Location of PIN 19
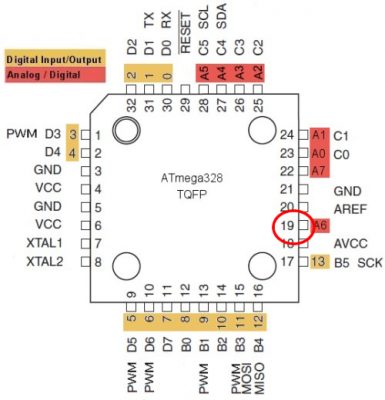
Location of PIN 19 shown with the yellow pointer
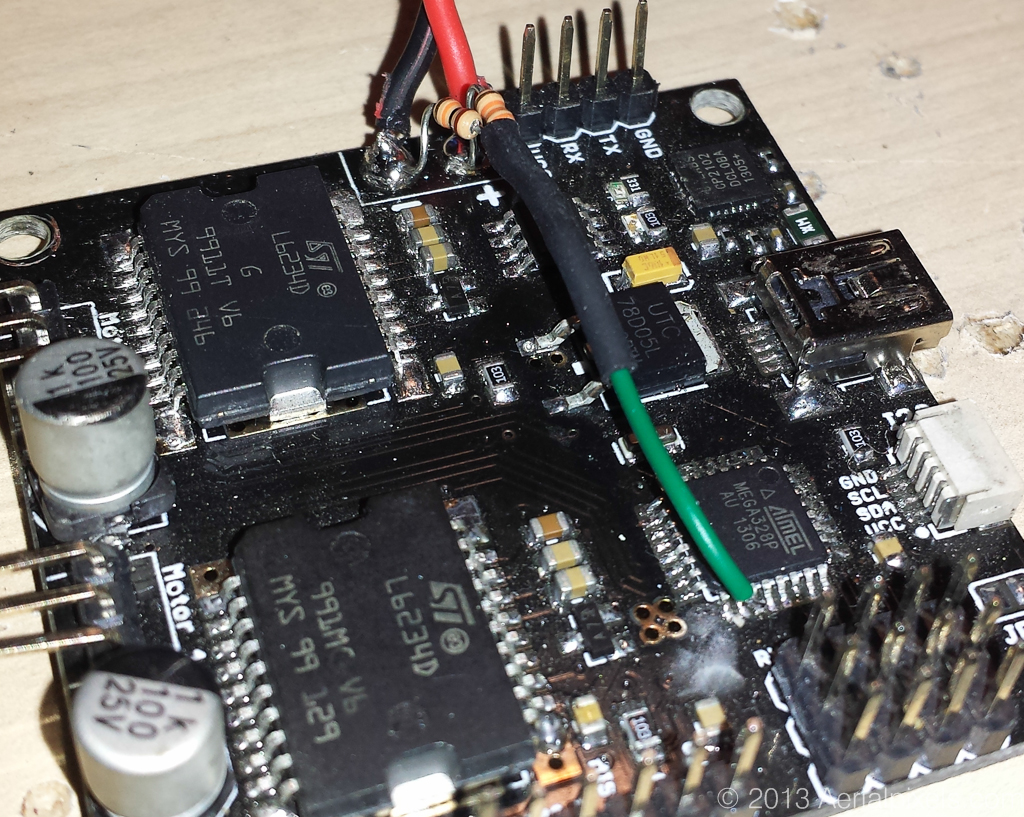
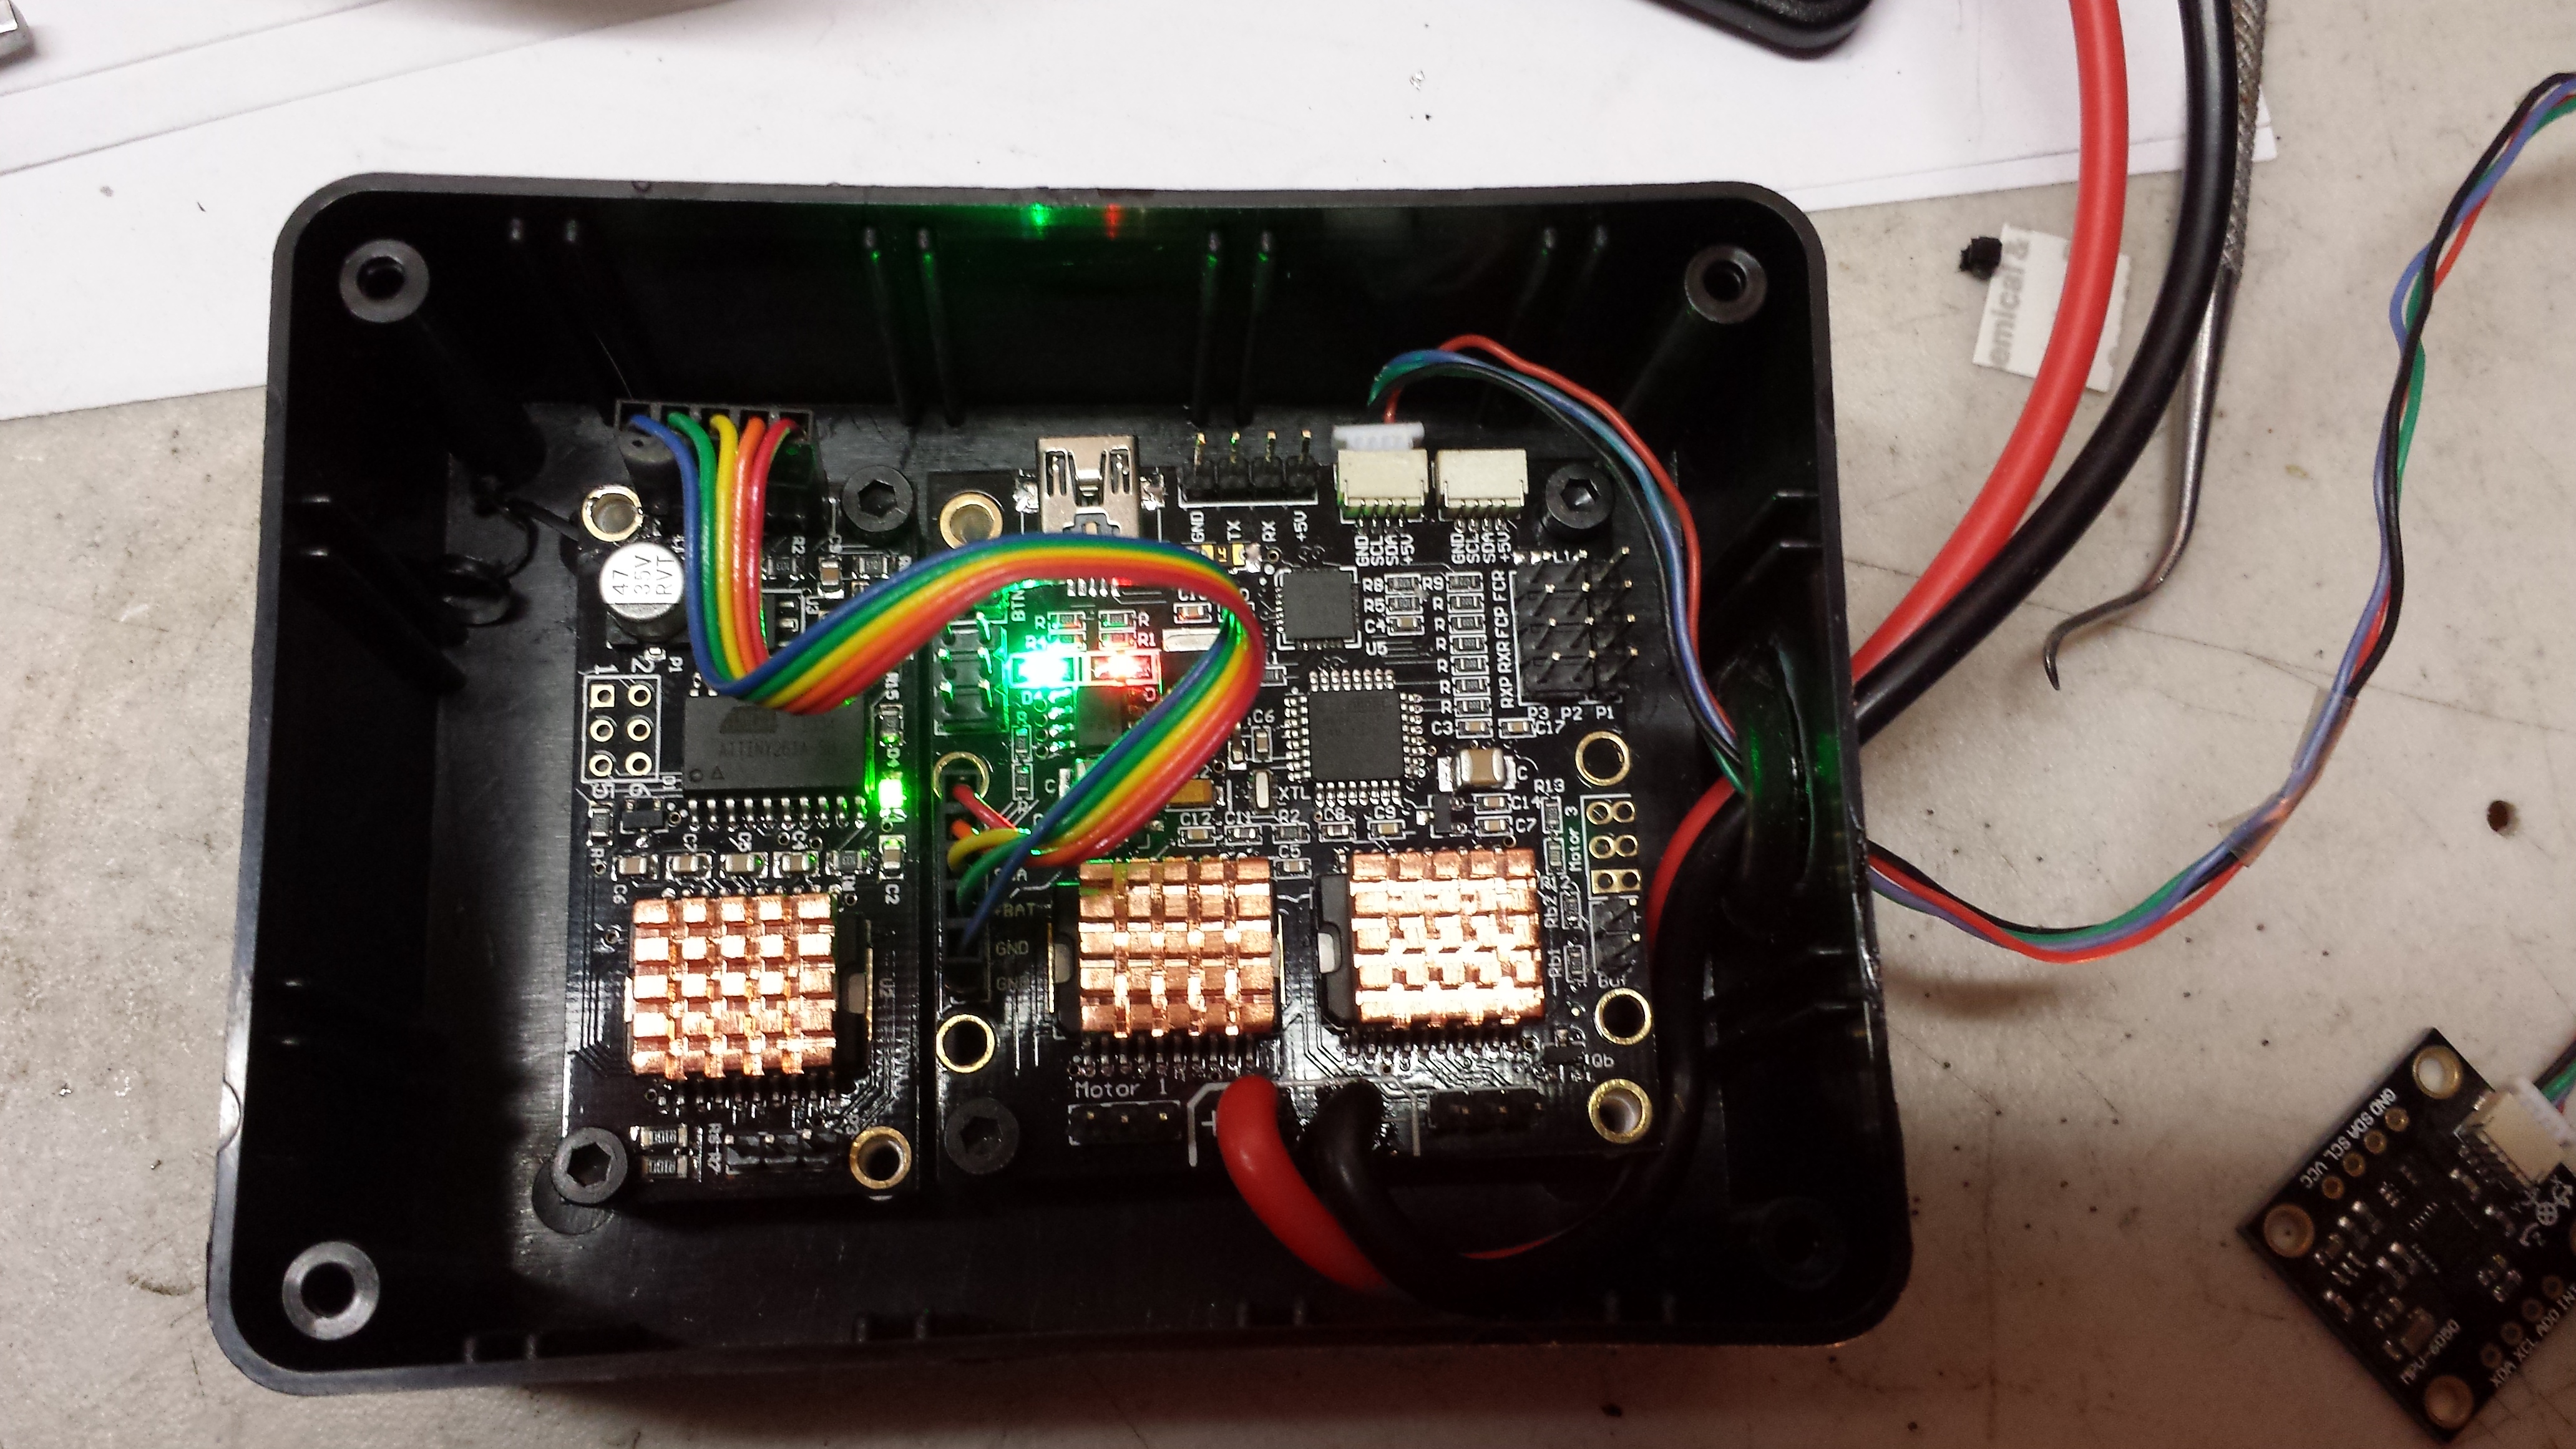
Completed view